Saturday, May 26, 2012

Aging New Mason Jars and Lids


I have a few of the old blue mason jars with the zinc lids and love the look of them.  I've tried painting new canning jars with the Vitrea paint and heating them in the oven.  That worked well, but the Vitrea paint is somewhat expensive, even with a coupon.  I then found Suzanne's post on her blog Chickens in the Road about using Mod Podge, food coloring and water. 

I started with:
2 tablespoons Mod Podge
1 tablespoon Water
4 drops of Blue Food Coloring
1 drop of Green Food Coloring

I mixed those in a bowl, then played with the food coloring to make it more blue, although it stayed somewhat green... 


I poured some of the mixture in the clear canning jar and swirled it around until everything was covered.  I tried to let any excess drip out.


You will only be putting the color on the inside and please be aware that because it's Mod Podge, you cannot add water to these.  The color will come off.  I would not put food in them either.

Suzanne recommended using parchment paper, then foil on a cookie sheet.  I put those down and set the jars upside down on the parchment paper.  It continued to drip out, so I moved the jars around so they wouldn't have a pool of the mixture at the bottom.

I then put them in the oven at 200 degrees.  After a few minutes, I pulled them out and using a hot pad to hold the jar, carefully wiped off the excess with a paper towel.  (Even though I did this,  there was still a lot of excess even at the end of the process...) 

I put them in the oven for about 35 minutes total.


It's funny how different the colors look here, but once they were done, I couldn't tell them apart.


After the 35 minutes, I pulled them out of the oven and let them cool for a few minutes.  I didn't get a picture of this step, but there was a fair amount of goop that had pooled at the lip of each jar.  I used plain steel wool and wetted it with a little water to remove the goop.  I had to be careful not to rub the steel wool too hard into the jar, only on the lip where there was a lot of excess.


Now that I had bluish-greenish jars, I decided to see if I could make zinc looking lids.

I found some Dophin Grey paint and mixed it with Black Antiquing Gel.  I only used the antiquing gel because I couldn't find a bottle of regular black paint...


I used a 1" foam brush and dabbed it on until it looked rough enough.

I let it dry and kept adding a little more paint and texture until it looked right.  


I really like the way they turned out. 


I like the look of sand and shells in them too.


Thanks for your visit!

Pam


I've been nominated for Best Innovative Blog at Palatin Remodeling.  I'd love it if you would vote for me.


I am linking to the following parties:


>Funky Junk's Saturday Nite Special

Chic on a Shoestring Decorating

Sunday, May 13, 2012

What a Beautiful Time of Year

After many months of snow and cold, I am so happy to welcome spring!  May and June are absolutely beautiful here.


Yesterday I planted my pots. (yes, today my old body is feeling it!) :)


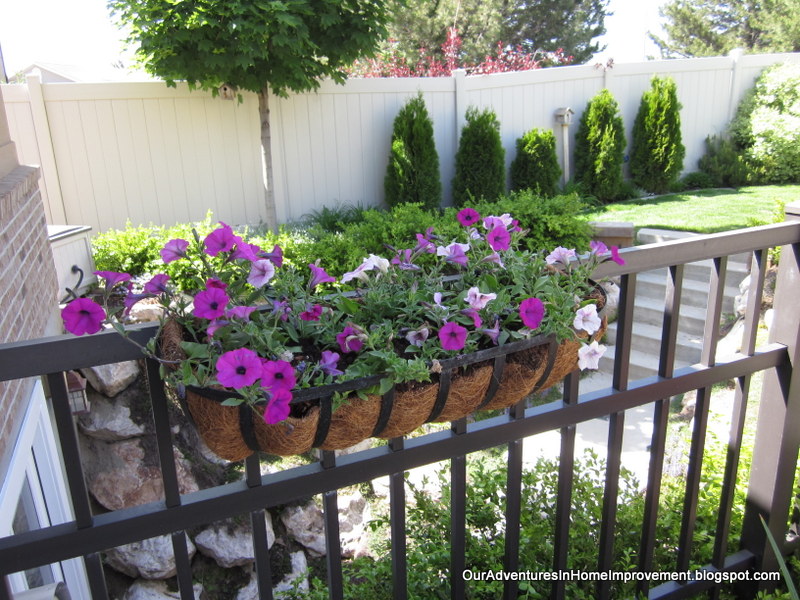
I planted cosmos, petunias, snapdragons and a spike in the middle of each.


I planted these a couple of weeks ago.  They are wave petunias and are already starting to fill in nicely.   (You can see the Arborviteas along the fence.  They were all the same size when I planted them two years ago.  What the heck is with the little guy in the center??)


 I love the adirondack chairs my husband built.  We spend a lot of time sitting in them.


The wave petunias in the boxes on the ladder and the perennials are starting to come back to life in this area.


The creeping thyme between the rocks is really filling in.  Last week I added rocks to the back side of the pond so my husband could get to the pump and filters without ruining any of the plants back there. 


The fish are getting big! 


 We used to have an ugly piece of mesh separating the area for Max to lay down in and the rest of the pond, but he never gives any indication that he'd go in the deep end, so we got rid of it.  We love the look of the pond without it!


He is definitely my favorite part of the backyard! 


 We had dinner out here last night and it was a perfect night!  I'm looking forward to everything blooming and many more nights out here this summer.


Thanks for your visit! 
 Happy Mother's Day!


My blog has been nominated for Best Innovative Blog at Palatin Remodeling, Inc.  I'd love it if you'd vote for me!

VOTE HERE

Pam


I am linking to the following parties:


The Polo House's Favorites on the First Party
 
UndertheTableandDreaming

Sunday, April 29, 2012

Peony in Bloom

We have a beautiful tree peony right by our front door.  It is heavenly in spring when it blooms!


There are six blooms on it right now and all of them are huge!


Just a few days ago one of the buds looked like this.


What a difference a few days make.


Peonies were my Mom's favorite flowers, so it always touches my heart to see these.  She would've loved them!


Thanks for your visit. 

Pam


I am linking to the following parties:

 
My Uncommon Slice of Suburbia

Cottage Garden Party

Friday, April 27, 2012

Delicious and Easy Artisan Bread

I saw this picture on Pinterest and knew I had to check it out.

Janet @ Simply So Good shared this amazingly easy recipe.

Delicious bread using only 4 ingredients!


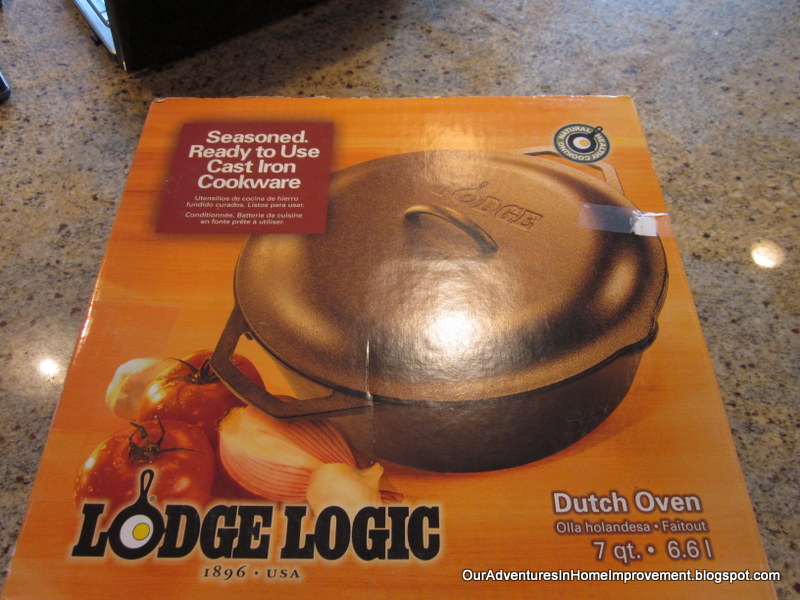
You'll need a cast iron dutch oven with a lid.  I immediately logged on to Amazon and ordered this 7 quart one.  You will need one that is at least  5.5 quarts for this recipe.


Janet uses a LeCreuset for her bread.  I'm not in her league as a cook, so this cheaper cast iron pot is fine for me.

I did wash it and wipe it with vegetable oil first, as that's what the manufacturer recommends for this dutch oven.  Janet does not put any oil or sprays or anything in her LeCreuset first.


You'll only need 4 ingredients:

3 cups All Purpose Unbleached Flour
1 3/4 teaspoons salt (Janet used Kosher salt, so I did too!)
1/2 teaspoon yeast


Whisk those together in a large bowl
Add 1 1/2 cups water, mixing together with a rubber spatula


When it's all mixed, put plastic wrap over the bowl and leave it on the counter for 12-18 hours. 
(this is what it looked like this morning after 14 hours)


Preheat your oven to 450 degrees

Once it's at 450, put your dutch oven with the lid on in the oven.  Leave it in there for 30 minutes.

Take your dough and put it on a heavily floured surface.  I used my pastry cloth with way too much flour.  :)


Shape it into a ball.  It'll lose some of its size, but don't worry.  Put the plastic that you had over the bowl over the dough until the cast iron pan is ready.

BE VERY CAREFUL when you pull the
dutch oven out.  It's HOT!

Lift the dough up (without the plastic!)   Put some flour on your hands as it'll be really sticky.  Set it in the dutch oven.  Put the lid back on and put it in the oven for 30 minutes.


Here it is after 30 minutes:


Remove the lid and cook for another 15 minutes.

I was afraid it might stick, but it popped right out.

Leave it on a cooling rack for a few minutes. 


We could only wait for about 10 minutes...


It was DELICIOUS!

I will definitely be making this again; in fact, I will probably prepare another batch tonight!

Please go to Janet's blog to get lots of ideas for different ways to make it. 


Thanks to Janet for the recipe and great tips and thanks to you for your visit!

Pam